Quarantinker #2: Hand-Me-Down Table Saw Rehab

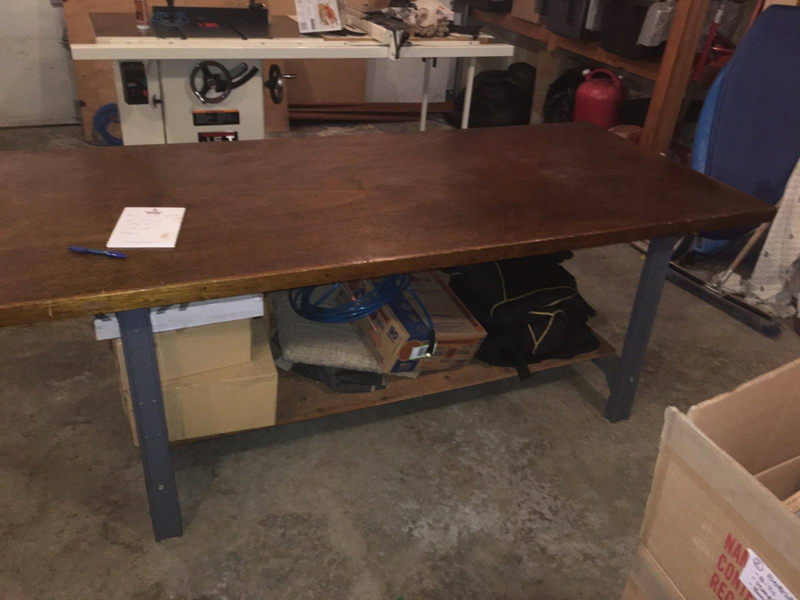
Except for occasional use, my father’s old table saw kicked around the garage for 8 years, its only movement being to for the purpose of jamming it into another corner to make space. However, one look at the current project list meant it was time to either salvage this saw, or go get another one. I think it was Robert Frost who wrote, “Two roads diverged in a yellow wood. And I – I took the cheaper one.”

A straightedge placed across the table rocked like an old man on a porch. A slab of birch slid across the top hung up on the burs in the surface and came out crooked and gouged. Use of the riving knife was impossible, as I couldn’t get it to align with the cut.

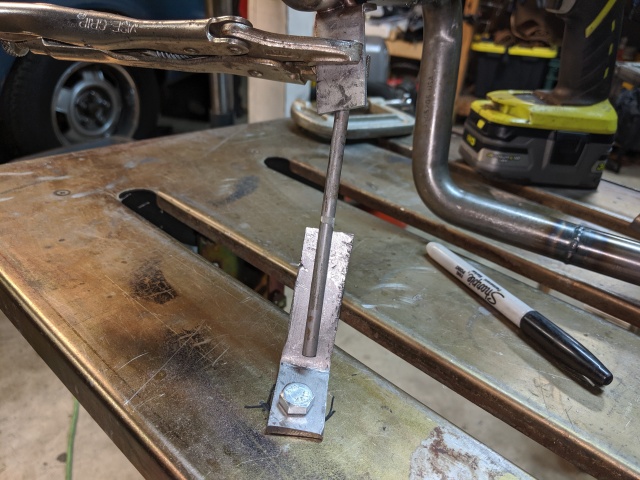
Step 1 was to check the basic geometry, i.e. that the saw blade was parallel to the fence. I breathed a sigh of relief at the possibility that the haphazard cuts just might have been due to something other than a lack of talent:

That’s quite a gap on the far side of the fence.

Luckily, there were two adjustments to play with. One was to loosen the bolts that held the saw in the chassis and make sure the table and the fence rail aligned. That made the alignment with the fence itself worse. Luckily, I found the adjustment screws on the fence before giving up. I’m going to guess this is standard fare on saws. Regardless, it goes to show that standing and staring blankly at something can produce results!

Starboard screw in a half turn or so, port screw out, and things lined up nicely:

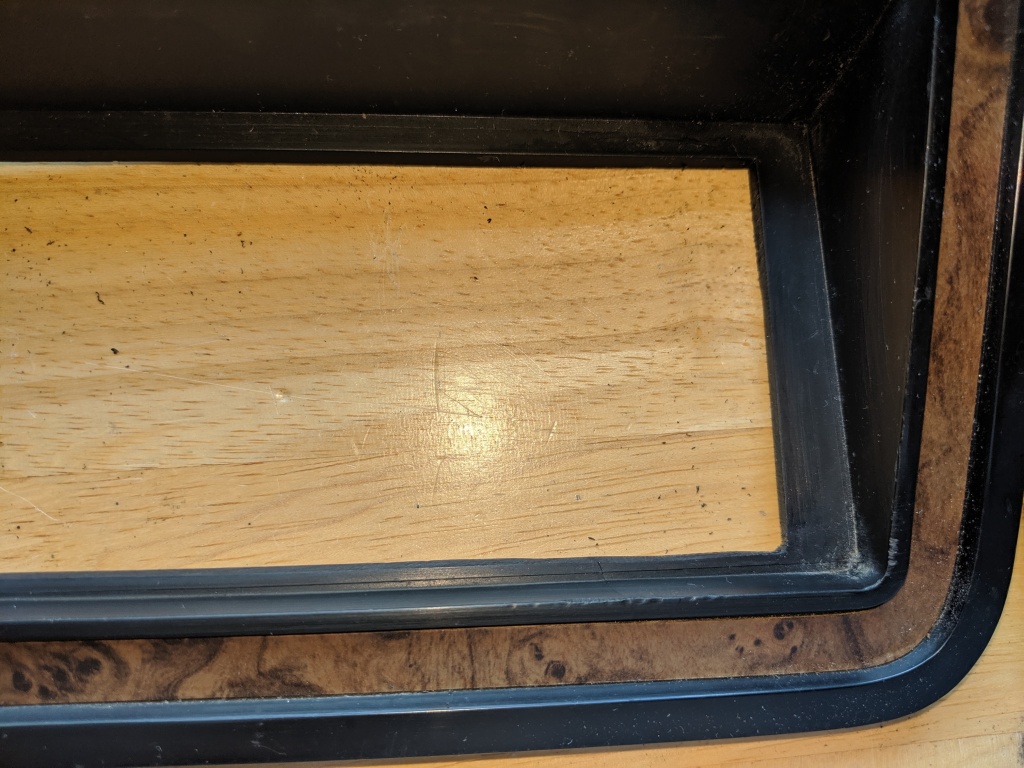
On to the table top. Much is made of “machined surfaces”, which something like this should be. As the builder of this saw took the cheaper road as well, this surface was never flat.

My old Volvo once blew a head gasket. Before giving up and heading with a checkbook over to a machine shop for a thousand dollars of work on a $500 car, I laid out some aluminum oxide sandpaper on a granite countertop, and spent three hours running the cylinder head, which was just out of spec for being salvageable, back and forth across finer and finer grits of paper in an “X” pattern. Correct procedure? No. Still blowing combustion gasses into the coolant? No.

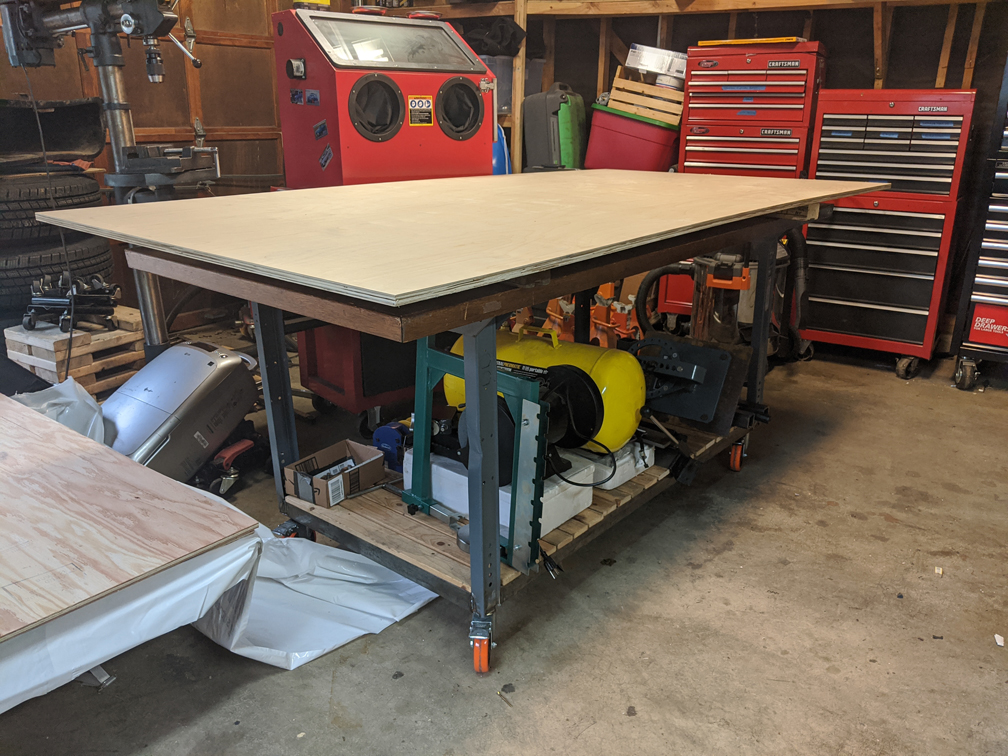
With that in mind, I grabbed some rectangular tubing, some sandpaper, and a squirt bottle with water, and with the same “X” pattern, leveled out the pronounced crown in the middle of the table, taking out the numerous burrs that had accumulated and were gouging the sheet goods, and rounding over the rough edges.

Rehab supplies: Paste wax and a finger of grease on the worm gear that raises and lowers the blade.

Here I noticed that the insert was too high, sticking above the surface. A little sanding on the mount underneath and it sunk down flush enough to sand with the rest of the top. Next task was to check the angle of the blade and give a slight tweak to the pointer on the angle indicator to match it. While down there I stuck a finger of grease on the worm gear to make raising and lowering the blade the one-handed operation it should be. The blade itself was replaced when I first got the saw, and it was immediately apparent how much less the motor was working through a cut.

The last step will be to apply some paste wax to the surface to keep it clean, but it needs a bit more sanding first. But cutting is already much easier – and better.

Quarantinker

I’ve yet to attain that next-level, DIY version of the old “Penthouse Letters” that pops up with infuriating frequency on garagejournal.com: “I never thought in my wildest dreams that this would happen to me, but I was sitting on the can one day surfing Craigslist when I came across a perfectly restored vintage South Bend lathe – for FREE! Needless to say, I pulled my pants up, jumped in the truck and sprinted over to the owner’s house. Turned out the owner was the nicest elderly gentleman who restored it but didn’t have a use for it! I offered him some dough as we loaded it up, but he would only say, ‘I cannot take your money, but I can setup a trust so that when your 2 children reach college age, it will pay their tuition!’ Man, today was my lucky day. Read ’em and weep, fuckers!”

However, the above photo did show up on my phone with a statement along the lines of it not being used, and the owner would be glad to reclaim the space in his garage. I had been pondering the heavy square tubing with plate steel top table that doubles as a bomb shelter, but the two years or so that this idea was kicking about told me to forget about it and jump on this offer. With the mahogany top and the steel frame, it would more than do for 90% of the time.

Fast forward past the three weeks it was kicking around the back of my truck, and it was sitting in my garage. While much better than the bench it was replacing, it turned out the legs were made of stamped steel, and the table had a pronounced and unsettling wobble. Forcing aside thoughts of an extensive rebuilding that I would never complete, I set about the yard to see what she would offer up beef up this frame. Sure enough, behind the shed (another unfinished project) lay some rusting 1×2 steel tubing which, even at 17 ga thickness, would shore things up nicely, and provide a perch atop some heavy-duty locking casters.

Can’t remember what project this steel was for, but it probably wasn’t as useful as it will be now.

After a cleanup, cutting and welding into a rectangle, it was time to remove the existing bottom shelf, now redundant and not as big as its replacement. Unable to find plywood for the bottom shelf, I grabbed a stack of bed slats destined for the garbage and formed a shelf from them. Time for some MIG practice: welding the casters to the new frame and, after notching the feet to accept it, welding the frame to the bottom of the table. This stiffened the legs way up, so that now there is no movement when sitting on the table.

The new structure was a simple matter of notching the legs with a grinder, and fitting the frame. Leftover pieces of 1×2 in the corners formed the base for the casters.
A piece of plywood would have been ideal here, but freeing up the floor space under this pile of scrap was a win.
Loaded up and ready for work for now. reinforcing the legs with some tubing, and running a bar across the length toward the top for some drawer space would be a nice upgrade in the future.

Next furious distractions from this God-awful time: sorting out a free el-cheapo tablesaw and ripping that sheet of plywood, and others like it, into a desk and shelves for Daughter.

Sooner Or Later…

Work clothes + AAA = Screw fixing this fuel leak.

As the country goes, so goes the Avocado. You knew something would happen. Things just kept going, and it felt like they did so on borrowed time. What would happen was anybody’s guess, but we just kept puttering along, fixing little issues as they came up but really running on hope that nothing big would happen. Unfortunately, our shitty little metaphor ends there, as the US doesn’t have AAA, and her issue is way worse than the ruptured return line and lack of desire to get underneath the truck in my work clothes to patch things up.

But the free tow got it to a shop, which, definitely not for free, dropped the tank and put a 90 degree return line fitting on the tank to keep the line away from the bottom of the bed. They returned the truck 3 1/2 weeks later. The fuel gauge no longer works, and the fuel sloshed out the vent line which they seem to have forgotten to tighten. Given the urgency of finding silver linings in the current crisis, I’ll stop the ruminations at feeling a bit better about my own fuckups, since I don’t charge anyone a Benjamin an hour for them.

At any rate, back to work, feverishly searching out happy distractions such as grabbing a load of topsoil before the rumored lockdown comes, so that Daughter and I can pursue some vegetable gardening during a necessarily isolated spring. In our new world, the cashier line of three stretched across the parking lot.

Last errands before the return of rain and the coming lockdown.

Thinking of musicians, service professionals, anyone who relies on humans’ social proclivities for income. It just ain’t the same on Skype, and I just can’t wait to get back to a Mike Stern concert.

Fuel and (Compression) Ignition

Fun fact: The time it takes to prime a fuel system is equal to the time you crank the engine over with cracked injector lines in to get fuel to the pump, plus the 2 seconds you spend sucking on the fuel line because you gave up and decided you needed a quick test to verify a plugged line. After these 2 seconds, you’ll conclude via a mouthful of fuel that you really only needed 2 more seconds of cranking the engine over to prime the system. This is wrong: no matter how much longer you cranked, you still would have needed that additional 2 seconds to poison yourself. And no matter where you open the line to check whether it’s plugged, the fuel will be lurking 2 centimeters from the point at which it would start dripping out before you check it.

Nonetheless, after the considerable exercise of bleeding all the air pockets out of the fuel system, the 4BT cackled to life once and for all, emitting no more than a faint wisp of smoke to signal its long dormancy. To get it moving required bleeding the newly installed (albeit highly used) clutch hydraulic system. After tiring of trying to do it properly using a 2×4 to wedge the pedal down while I crawled underneath and cracked the bleeder screw on the slave cylinder, I followed the recommendation of a poster on ford-trucks.com, who ventured to a chorus of catcalls that when stuck doing this alone, putting your foot on the pedal and shoving it at the firewall 150 or so times will produce the same result. The Dodge power steering pump, while leaky, eventually worked it’s own air problem out and the steering effort ceased to exist. Before I knew it, I was doing passes by the shop, giddy at the sudden clearing of problems and how well the drivetrain worked all of a sudden. The gearing seemed reasonable even without the overdrive hooked up, and the turbocharger, purchased after a less than diligent amount of research based on a sticky thread on 4btswaps.com, howled like a Pratt & Whitney with nowhere near the predicted lag.

To produce this scene, buy a brand new drum from Napa. Clean with brake cleaner, then coat it with some caliper paint and lovingly place it on your rebuilt rear brake assembly. Then let it languish in the driveway for 3 years.

Not a moment too soon, this turn of events produced a charge of energy. Gone was the chore of it all, and with a few more adjustments, I decided to limp the truck home so I could swap out the parking spot. It was then that that I was reminded of the one knock on these swaps, which is that it is a big, combustion ignition 4 cylinder, and anything that is not secure will fall off the truck from the rattling. About 5 miles in, the comfortably uneventful ride because an unnerving series of pings and pops of things falling out of the engine compartment. After so long, there were bound to be a few bolts left around, I thought. But the fallacy of this revealed itself with a quick check under the hood. Injector line hold down bolts were missing, and the pyrometer probe had worked its way out of the exhaust manifold. The following day I took note of the increasingly terrible body fitment, notably the huge gap between the cowl and the hood. After a smack of the forehead upon realizing just what this was, I opened the hood to inspect the bolts that held the front clip to the firewall.

Loctite it or lose it! Fortunately, these have held tight after retightening with Loctite on the threads.

Fortunately, as these things are addressed, they seem to remain resolved rather than keep popping up. But I began to wonder if that vast chasm between the time when the truck is torn apart and the drivetrain is on the floor in the corner, and the moment it runs, is not as large as the one that lies before me now, between a running and driving truck and a good one.

What stands between a runner and a good truck.

Next up, the last thing before The Avocado is a true driver: getting the front brakes to work properly.

Pressure?

Reviewing the last entry, it seems we left off back in some dark days of troubleshooting a discouraging reading of “0” on the oil pressure gauge every time we spun the engine over. There was no firm answer, even from my long trusted repair shop, as to why the oil pump wouldn’t prime. The only reasonable thing to do was to retrace what little work on the engine I did before installing it, which was pull the pan and pickup to have them modified to fit the infamous 2wd Ford rear steering mechanism. I had purposely avoided messing with the engine internals to avoid precisely this. There was no doubt the fabrication work to notch the pan and elongate the pickup tube was flawless, but there was no better place to start.

Surely my luck had to turn for the better, and it was with that in mind that I left the engine hoist in the corner and dove underneath to see if the pan would come off with the engine in place. Sure enough, dropping the pan allowed just enough room to disconnect the oil pickup tube and let it fall out of the way and into the pan, which in turn allowed me to move the pan rearward just enough to turn it sideways, where things paused just long enough to remove the front sway bar. Then the pan came out, and distant memories came flooding back as I inspected the pickup tube and the shoddy work I had done on the bracket which secured it to the block.

While the fabricator inserted the specified amount of tubing into the middle, it was up to me to realign the bracket that mounted the tube to the bottom of the block, and it was clear I needed to humble myself and start there. Brow furrowed in suspicion, I then recalled our kitchen countertop and it’s machined granite surface, which had previously saved the day as a surface on which to sand a warped Volvo B21 cylinder flat enough to keep its new head gasket from leaking. I went inside and held the pickup tube to it to see if I could detect any telltale wobbliness and thus explain the oil suction problem. But it was solid and felt flat. I then tried one more thing: holding the flange of the suction tube flat against the countertop with the mounting bracket over the edge of the table, where it would be hanging in midair rather than pressing against any surface. Then, having established that the tube was firm and flat against the countertop, I swung the opposite end where the mounting bracket was to the edge of the counter to see if it slid on as true and flush as it seemed to be. It was at that point that the problem with the whole setup became glaringly apparent. The end of the mounting bracket was about a half-inch below the top of the counter. Putting the whole assembly back on the counter, I then lowered an eye to see if I could see any light shining under any portion of the pickup flange that mounts to the bottom of the oil pump. I could. Despite the fact that the tube felt flat and true, it was not.

What the ???? Apparently, this mangled mess was deemed acceptable late one night. Cutting the bracket illustrates via the overlap when laid on a flat surface just how incorrectly things were done, and the length caused the oil feed tube to remain unsealed on the other end.

With that load lifted, I gleefully reworked the bracket, bounded back to the shop and, with new gaskets and renewed enthusiasm, reinstalled the pickup tube, and buttoned up the oil pan. I lowered the truck back down, put the oil back in, and spun the starter over, half wondering if I even needed this tedious verification of such a slam dunk fix before attempting to start the truck for real.

Using steel rod and a jig to weld up an accurate if homely fit.

0 psi.

It didn’t take many goddammitfuckshits to realize how little there was to lose at this point. One piece of advice I had gotten from my favorite shop – though they had never had to do it on a Cummins – was to pull the pump and pack it full of grease so that any opportunity for the passage of air could be removed until the pump has primed. This was also a rare point of consensus on the forums. Thankfully, the oil pump on a Cummins B engine is amazingly accessible, held by 4 bolts right behind the timing cover.

In a just world, such agony should be rewarded. I rewarded mine with a Milwaukee 12V variable speed trigger ratchet. The amount of time saved with one of these is incredible. I was staring at my oil pump within fifteen minutes of deciding to open it up, courtesy of sicking this little beast on the 20 or so bolts that hold the timing cover in place. And, just as quickly, the trying uncertainty was once again replaced with the lightness of certitude, as I discovered that of the four bolts that held the pump in place, 3 were barely tight and nowhere near the torque spec for those bolts, and the fourth was falling out. It seems that whoever installed this pump did so a) recently, as the inside of this assembly was unbelievably clean; and b) with little care. I was ecstatic that the pump didn’t seal, affording me the opportunity to address it.

After packing the crevasses with grease and filling the remaining empty space with 50 weight oil, I put the pump back in the motor and buttoned things up. Shortly thereafter, I jumped the starter solenoid and watched a geyser of oil flow out of the disconnected turbo feed line.

Disconnect the turbo feed line and plop it into a cup to check oil flow prior to startup.

Onward!

She’s Breaking Up!

It’s never happy days when you’re ruminating about the fuzzy but ominous radio voice pronouncing the doom of Steve Austin’s experimental rocket in the intro to “The Six Million Dollar Man.” But here we are, teetering on the brink of ignominious not to mention expensive defeat in the final stages of Avocado assembly. While not seriously entertained, rationalization of and plans for a reversion to the old 390 slither around the back of the brain and spawn more, sillier, more irrational thoughts: With 8 gears and a 3.55 rear end, surely you’d get north of 10 MPG! At any rate, this fixing/making thing will never be a viable outlet, and you’re doomed to a boring, talentless life of Ray Liotta at the end of “Goodfellas.” You should blog about something more substantial, anyway. Maybe take up the torch of Andy Rooney and bury WordPress in rants about toilet brushes.

“I don’t know WHY we use a toilet brush to clean the toilet. Seems to me that scrubbing dirt out of a large bowl that flushes out the dirty water and refills with clean water, and putting it in a tiny receptacle that doesn’t flush the dirty residue, or fill with clean water, is a recipe for disaster…”

We were puttering along nicely, putting in a steady 4-8 hours per week in and underneath our patient. Gauge pods were assembled and installed without evidence of a seizure during the process, a shifter cane was bent up perfectly for the T19, which had been dispatched rearward 6 inches to make room for the overdrive, the exhaust was adjusted, cut, re-welded, assembled, and mounted. Rivnuts were driven into the core support to provide the final mounting holes for the intercooler. (These little beasts let you screw proper cap screws into sheet metal where you don’t have access to put a nut on the other side.) Typically, you’d use a sheet metal screw, but despite the domain name, there’s no joy in reaching for a recessed piece of wiring and raking your knuckles over the business ends of sunken drill screws.

A little adjustment, and it’ll do. The former occupant of that space, and old AM radio, undoubtedly played both kinds of music with aplomb back in the day, but it hadn’t made a peep in years.

Gingerly using a heat gun and a brake line tubing bender, the plastic hydraulic clutch line was straightened and rebent to fit a truck a decade older than the one it was made for, and all that remains is fabrication out of steel plate of a retainer bracket for the slave cylinder to try the clutch setup. The rear bumper was installed. The tail light wiring harness, mangled and butchered from a universal trailer harness and weather, was cleaned, resealed, reloomed and installed, while a trailer harness specific to a dentside Ford pickup that plugs into the existing 4-pin connectors rather than relying on those cheap plastic wire taps is in route from eTrailer.

In went the fluids – the notched oil pan fortuitously takes as its reduced capacity an even 2 gallons of oil. And in they stayed. The radiator was bracketed down, the electrical hooked up, and the starter bumped. All that was needed was to spin it over and make sure the oil pump could pump oil before hooking it to a fuel can and trying to fire it.

Nearing a test fire before final cleanup.

In retrospect, that presumptuous order of a trailer harness might have been what did me in. Even after pulling the injectors to remove compression resistance and dumping some 50 weight oil down the filter housing to prime the oil pump, the engine would not make any oil pressure while the starter spun it. Not one pound, not after a full minute of spinning it over.

After running headlong into the axiom that an internet search will return a number of different answers to a question that is a full 90% of the total number of answers and therefor will give the searcher no comfort or confidence in any of them, a strange calm descended. Plan B, culled from said searches and a desperate call to my favorite mechanic:

  1. Pull the pan. The only piece of the engine that was messed with prior to installation was the pan and pickup tube. It’s a pretty easy operation, and the modification was done by a professional fabricator. Nonetheless, there’s as much chance that there is a pinhole in the pickup tube as there is of trouble elsewhere. Seal off the pickup end of the tube and fill it with liquid to test for leaks. You should have done this to begin with, just like you did the pan, Champ.
  2. Pull the oil pump, inspect for damage and check for clearances. Pack it, or its replacement, with grease to create a vacuum. Reassemble.

After all, this is what you signed up for.

Here Are A Few Cars From The Fantastic Le Mans Museum

Carrying 110 million passengers a year, France’s TGV does a lot of people a wealth of good. Not least among its accomplishments is depositing drooling gearheads on the Le Mans station platform a mere 55 minutes after departing Paris. Thus, even when there’s no racing afoot, it makes for an easy excuse to jettison the hoards of fellow tourists for a day and head out to see the fantastic museum at the entrance to the Circuit de la Sarthe. Here’s a taste, starting with a BMW exhibit:

Group 5 BMW CSL A rummage through the Internet turned up this article on Petrolicious on what looks like the same car. Speedhunters also has one, and while it’s not the same car, put a little of this noise of a similar car in your ear holes.

More Bimmerporn:

Onward with a few photos of the permanent collection:

Ferrari 166 MM’s 2.0 liter V12 carried it to victory in 1949.
Citroën 2CV
This Delahaye raced in the 1937-39 races, and once more in ’49.
Where to start…
This GT40 Mk 1 was raced by a French team in the 1967 race. Alas, as the small block Mk1s were wont to do, it blew a headgasket and didn’t finish.
917
The Jaguar XJR-9 ended 7 straight years of Porsche dominance in 1988.

Diesel Gauges for the F250

Anyone who’s messed with a mechanically injected diesel knows that things melt quickly if the wick is turned up without additional monitoring. The defueling that a modern engine management system will initiate when temps get too high is done in a purely mechanical environment with a lifting of the right foot.

Unfortunately, there typically isn’t much room to install extra gauges, and this necessitates jamming them under the dash, on the pillar, on top of the dash, or a homely combination of the three that causes the driver’s compartment to take on the appearance of the cockpit of a wrecked DC-9.

“No, officer, nothing to drink. Was just looking for my oil pressure reading when I hit that parked car.”

Good news here is that the aftermarket for 73-79 Ford truck interior retrofits has perked up in the last couple years. The instrument cluster can be replaced with units that house aftermarket Auto Meter or similar gauges. LMC and Classic Dash are two places that sell them. While I love the look of the round gauges in the previous generation, their look in this model doesn’t work. Dakota Digital has the nicest match with the original styling, and were I amenable to spending the money, I’d seriously consider that route. But the goal here is just to add enough additional gauges to monitor the Cummins for as little as possible, especially since I already have 2 of the 3 gauges from a previous project.

The three gauges are: mechanical oil pressure, pyrometer, and boost. A tachometer would be nice, but it’s an old 4-banger Cummins. When your fillings fall out, shift. A pyrometer is a must for pulling any load and becomes even more important with performance upgrades. Check both boxes here. We’re turning the fuel up to match the upgraded turbo and intercooler and towing a travel trailer when we’re done.

Now for placement. I never liked hunting for gauges in the standard retrofit place, which is hanging under the dash. As it happens, this model truck has the radio located close to the driver, rather than in the center of the cockpit, in a pocket right next to the instrument cluster. The current resident was a cool looking but completely useless original Philco AM radio. While I’d been hoping to get by without modifying the dash bezel or anything else, this was clearly the solution even though I’d have to cut the radio cover out. This was made all the more appealing by the fact that our Lord and Savior Gale Banks has introduced a standard 2 1/16 size gauge that is selectable and programmable If 3 gauges turn out to be too few, 1 or 2 of these will give all the information I could ever want by just swapping them into this setup.

So, off with the dash bezel. Unfortunately the video of the process didn’t save due to camera malfunction, but the nice thing about these cheap plastic bezels is that it really is as easy as a few files, a scuff pad and a metal sawzall blade for hand cutting:

Out with the AM radio, right, and in with the gauges, left. The bracket is used to hold the radio and the heater controls above it, and simply needed some notching to accommodate the left and right side gauges.

Gauge backing plate: The one other piece needed for this is a piece of sheet metal to hold the gauges. Use a thicker than standard 18 gauge, as the sides near the holes bends quite easily due to lack of material. Find the center of the space in the bezel, not the sheet metal, as things are not quite centered, and mark the corresponding spot on the sheet metal. That will be the middle gauge. Then find the outside edges that the 2 outer gauges will form. Then measure 1 1/16″ in from there to get the centers of the 2 outer gauges, since we’re drilling 2 1/8″ holes, and have at it with your 2 1/8 hole saw.

Bezel: Anyone who has worked on old American cars is familiar with the oversize 2-knob radio chassis that necessitates cutting to replace with anything other than an oversize, 2-knob radio. I’d never come out of this exercise looking like I used anything other than a rabid pit bull to do the cutting, but I seem to have made progress with this attempt. Here’s how:

  1. Ditched any power tools, even a Dremel. I grabbed a metal cutting sawzall blade to cut the big pieces of the bezel that blocked the gauges.
  2. Like with woodworking, cut proud and sanded or file down to target shape. The bigger file was for the long edges, and the smaller was for corners. Next time, I’d even add a finer file than the ones in the picture to slow down as I closed in on the final shape
After cut, before filing.
After. Not perfect, but won’t jump out, either. A small sanding block will finish this, but I’m not worried about it here given the use of the truck and the overall condition of the bezel.
Loosely mocked up, ready for wiring and installation.

The sheet metal backing plate is coated with Dupli-Color aerosol bed liner. Not sure how it works in an actual truck bed, but I’ve had great results spraying an entire dash to get rid of that cheap looking fake leather texture. Here, it camouflages imperfections in the hand-cut hole in the bezel.

Now the biggest challenge is not knocking it off the bench in the 2 or so weeks before I can get it back to the truck, which is stored elsewhere. Meanwhile, there’s a big section of exhaust to tend to next.

Avocado Ripens

Not to confuse seeing the light at the end of the tunnel with basking in it, but the F250 appears to be nearing road readiness. Only 2 big jobs remain: plumb the clutch hydraulic system, and plumb the fuel return system. These last few weeks have been helped along not only by the need to accomplish and subsequently yak about something more substantial than a drill chuck change, but by access to a lift.

Now we’re in business…

I have yet to do anything that can’t be accomplished without one, but the increased space seems to result in increased blood flow to the brain. You can see everything whole, just like the topside, and piece together solutions, like resolving that 5 degree mistake in the outlet of your custom downpipe that you might have blown off because of the darkness and misery in a world without lifts.

Pic of exhaust system fix goes here, but that pic is currently inaccessible, so have one of ol’ Shooey Ricciardo’s F1 whip instead.

The whole mess of parking brake cable can be seen at once, and an easy solution to securing it all becomes readily apparent. For me, that’s much needed progress on a project which I’ve honestly come to regret undertaking.

About that: This is the second engine swap for the Avocado, which I got off Craigslist for $1,200. The seller had trouble getting it running right and was unable to put more time and money, the usual story. Nonetheless, we were able to get its rebuilt 390 running long enough to get it onto a trailer, and I felt like a carb change would make a driver of it.

It wasn’t long before an inspection turned into yet another case of While-I’m-in-theres. There was just too much oil everywhere to not be curious, and I decided to pull the engine to clean and reseal it when I discovered that, among other things, the rear intake seal had come out completely, and there was a full 1/8 or so gap for the motor to blow oil all over the bellhousing and everything behind it. Well, if the engine was out, I might as well flip it over and pull a bearing cap. In doing that, I quickly discovered that the bearing was shot, there was residue everywhere, and this rebuild was not worth using.

Irrelevant but better pic #2. Unlike your author upon inspecting his 390, the man driving this Citroën DS had the placid look of utter peace as he floated by.

And it took the machine shop equally little time to determine that just as it wasn’t usable, it wasn’t rebuildable. They summoned me to run an eyeball down the length of each connecting rod. There were all bent. The consensus was that the previous rebuilder’s boring machine was not quite perpendicular to the block, and the second the engine turned over, the rotating assembly too was ruined.

Undeterred, I found another block and ended up with a solid running 390 that howled as intended – and pulled it after driving it about 6 months. As the truck has been down for roughly 3 years since, I no doubt regret it. I wish I’d addressed the fuel mileage and drivability woes with an overdrive – which I had sitting in the garage – a rear end change, and an aftermarket fuel injection system. I’m clinging to the faith that my opinion will change with the new setup that has kept me going since.

The “new setup” is this:

  1. Cummins 4BT engine. Little brother to the 5.9 that came in all those Dodges, this came out of a step van and produced somewhere around 105 horsepower in that van. But:
  2. HX30 turbo upgrade with intercooler. I didn’t do a lot of engineering here, my love for turbos is large but not enough to digest boost maps. This is a common and recommended upgrade for this engine. The intercooler is a Mishimoto model that, unlike every other Mishimoto intercooler I’ve ever seen, is affordable.
  3. Borg-Warner T19 transmission. This came with the engine, and also came in a bunch of Ford 6.9 trucks. Better than the T18 because first gear is high enough to be a functional first gear.
  4. Advanced Adapters Ranger overdrive. Thematically, found on Craigslist. It was setup for a Dodge, but Advance Adapters was able and willing to sell me the parts to mate it to a Ford-spec drivetrain. I had a Gear Vendors, but GV was adamant that while it was no problem to handle the power of the 6BT, the vibration of the 4BT would be its Waterloo.
  5. Rear axle swap. The Dana 60 originally under the truck had a 4.11 ratio. The noise and fuel mileage got old. What’s in there now is a limited slip Sterling with a 3.55:1 ratio out of a late 80s 1 ton.

The truck has some other mods which will get a few seconds on a video: fuel tank upgrade, fuel inlet changeover to a later year, new shifters. But overall the intent is to keep it looking the same. Nonetheless, the 2 jobs mentioned above are accompanied by a huge list of smaller but time consuming tasks:

  1. redo an engine mount weld that looks insufficient
  2. Cut out some inner fender to make room for the new fuel inlet
  3. install some folding mirrors
  4. configure the overdrive shifter
  5. sound deadener and flooring
  6. mount the rear bumper
  7. trailer brake controller
  8. reinforce intercooler mounts.

And that’s to get it roadworthy. To finish it would be another project.

Cheap and Easy Drill Press Upgrade

One advantage of having a garage as cluttered as mine is that you don’t have to trip over too many things before you fall on an easy win.  And drilling oblong and off-center holes in this mess since 2012 is a big old – albeit too new to be from the glory days – Craftsman 34″ floor standing drill press.  The press belonged to my father.  I couldn’t get enough of him before he died, and I’ll take whatever shitty, tenuous connection to him I can get.
 
Buried in a “10 easy upgrades…” YouTube that I unfortunately can’t find to reference here was a simple upgrade to a keyless chuck.  As a chronic loser of all types of keys, this in itself was appealing. However, I’d had no idea just how much of the press’s ills lay in the horribly made chuck itself, and how big a difference a $28 chuck would make in the ease and quality of the work done underneath it.
 
The work is in determining what size arbor you are dealing with.  As I tried it the first go around and have an extra, useless chuck here next to the keyboard awaiting its return to Amazon, I recommend not searching your model online for chuck size.  Best bet is to get the chuck off – I used a tie rod removal tool – and measure the top and bottom of the arbor with a caliper.  Then head here:
 
 
And match your results up with the charts.  Mine was a Jacobs Taper #3.  Jacobs #3 and #33 seem to be the most used.
 
The old Craftsman ended up with this chuck, and while any machinist would likely (and rightly) turn his nose up in the air at it, the difference is visible to the naked eye.  The change itself is incredibly easy.  Pickle-fork the old one off – I was careful to align the top of the removal tool with the bottom of the press so that misalignment and gauging occurred on the chuck itself – put the new one on, and smack it a couple times with the palm of your hand so it stays on while you get your hammer and scrap 2×4 to drive it home.  In fact, not content with the dearth of misery produced by such an expedient upgrade, I elected to turn it all into a protracted struggle with a newly purchased copy of Adobe Premiere Elements, and what my father would certainly have called “a long haul for a short slide” is below.